How to Factory Reset a Mac If You're Ready to Start Over
“Factory reset” for a Mac: what you’re actually trying to achieve
Right before you hand a Mac to someone else, “factory reset” usually means three things: your files are gone, your accounts are disconnected, and the next person can turn it on and set it up without calling you. If you only delete documents or create a new user, your data can still be recoverable, and Apple ID links can block activation later.
The goal is simple: take what you need, erase the internal drive the right way for your Mac, then reinstall macOS and stop at the setup screen. The hard part is that the correct steps change based on the Mac’s chip and macOS version—and if you guess, you can waste hours or leave Activation Lock behind.
Before you erase anything, decide what must come with you (and verify you can get it back)

Taking what you need starts with a blunt question: if this Mac never turned on again, what would you regret losing? Don’t just think “Documents.” Check Photos Library, Desktop and Downloads, Mail (if it’s “On My Mac”), Messages attachments, and anything stored inside apps like Notes, Voice Memos, or a password manager.
Pick a backup path you can actually restore from. Time Machine to an external drive is the easiest full safety net, but it only helps if you can open it on another Mac and see your files. For iCloud Drive, confirm the sync finished, then spot-check by signing in at iCloud.com and opening a few recent items.
This verification step is the annoying part, but it’s where people avoid the “I backed it up” lie. Once you can prove your data exists somewhere else, erasing becomes mechanical.
Which Mac and which macOS are you resetting? This changes the steps
Once erasing becomes mechanical, the key question is: what kind of Mac is it, and what macOS is installed? The erase tools and the “right” path are different for Apple silicon (M1/M2/M3) versus Intel, and for newer macOS versions versus older ones.
Start by checking two things: the chip and the macOS version. Go to Apple menu >'' About This Mac. If it says “Chip” and lists Apple M-series, you’re on Apple silicon. If it says “Processor” and mentions Intel, you’re on an Intel Mac. Note the macOS name/version shown there too. This isn’t busywork—picking the wrong path is how people end up in Recovery loops or staring at an Activation Lock screen later.
In the next steps, you’ll use that info to choose between Erase Assistant (newer macOS on supported Macs) or Recovery Mode Disk Utility (everything else), and the sign-outs that matter for each.
The sign-outs that prevent Apple ID and Activation Lock problems later
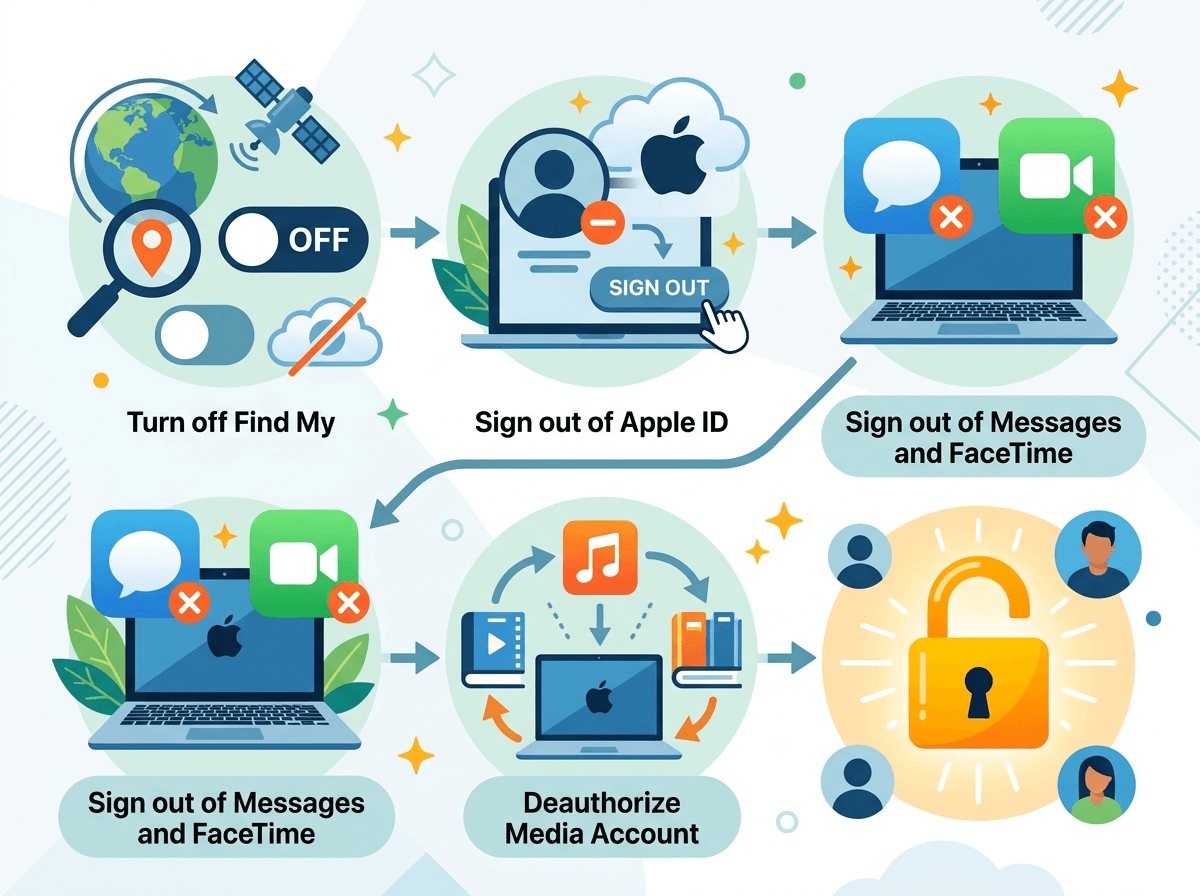
That last bit—“the sign-outs that matter”—is where most handoffs go sideways. People erase the drive, feel done, and then the next owner hits an Activation Lock screen because Find My was still tied to your Apple ID.
On the Mac, go to System Settings (or System Preferences) >'' Apple ID. Turn off Find My Mac if it’s listed, then Sign Out. When prompted, keep a copy of data only if you’ve already verified your backup; otherwise you’re just leaving more personal info behind. Next, open Messages >'' Settings/Preferences >'' iMessage and sign out. Do the same in FaceTime. If you use an older macOS with iTunes, also deauthorize the computer (Account menu) so you don’t burn one of your allowed authorizations.
The annoying reality: if you skip this and the Mac leaves your hands, you may be stuck removing it remotely from your Apple ID later—and you’ll be doing it while someone waits.
Picking your erase method: Erase Assistant vs Recovery Mode Disk Utility
That “someone waits” problem is exactly why you pick the erase method on purpose, not by habit. On many Macs, the easiest and safest option is built in: Erase Assistant. If you’re on macOS Monterey or later and the Mac supports it (common on Apple silicon, and many Intel Macs with a T2 chip), it removes your settings, signs you out at the system level, and wipes the internal storage in one guided flow.
Use Erase Assistant when it’s available because it’s hard to miss a step. The catch: you need an admin account and the Mac needs to be working normally. If you can’t boot cleanly, if Erase Assistant isn’t there, or you’re on an older macOS, you’ll use Recovery Mode and Disk Utility instead.
Recovery Mode works on basically everything, but it’s easier to erase the wrong thing if you have multiple drives connected. Unplug external storage first, then erase the internal drive (not just a volume) and only after that start the macOS reinstall.
Reinstalling macOS, then knowing when to stop so the next person can set it up
After the erase finishes, people usually click around looking for a “done” button. There isn’t one—the handoff point is when macOS is reinstalled and the Mac restarts into Setup Assistant.
If you used Erase Assistant, the Mac will typically reboot and offer to reinstall macOS on its own. If you erased in Recovery, go back to the Recovery utilities window and choose Reinstall macOS, then pick the internal drive you just erased (often named “Macintosh HD”). Keep the Mac on power and on Wi‑Fi or Ethernet; on slower connections, the download can take a while, and closing the lid on some models can pause things.
When installation completes, the Mac restarts and asks for country, language, and Wi‑Fi. Stop there. Don’t sign in with your Apple ID “just to test it,” and don’t create a new user—power it off at that screen so the next person can set it up fresh.
Last checks before you hand it over (and what to do if Activation Lock still shows up)
Before you close the lid for good, turn it back on and make sure you land on the “Hello” setup screen—not a login for one of your old user accounts. If you see a user list or FileVault password prompt, something didn’t erase, and you should go back to Recovery/Eerase Assistant and start over while it’s still in your hands.
Connect to Wi‑Fi for a moment and watch for an Activation Lock prompt. If it appears, the fix is not “try again later”—it’s removing the Mac from your Apple ID. On another device, sign in to iCloud.com, open Find My, select the Mac, then remove it from your account (or use your Apple ID device list to remove it). This can fail if you don’t have your Apple ID password/2FA; in that case, Apple Support may require proof of purchase.
Once it reliably returns to Setup Assistant, shut it down, unplug accessories, and hand it over.
A clean handoff: you keep your data, the next owner gets a fresh start
Once it reliably returns to Setup Assistant, your job is mostly to not “help” it anymore. Package it like it’s ready for a stranger: shut it down, include the power adapter, and if you’re selling it, remove any stickers, cases, or device-management profiles your workplace installed (those can block setup even after an erase).
Keep your backup somewhere you can reach later. Don’t wipe your Time Machine drive the same day, and don’t delete iCloud content until you’ve confirmed it’s on your next device. A clean handoff is boring on purpose: you walk away with your data, and the next person starts at “Hello” with nothing tying the Mac back to you.